
Heres Some Camping Tips & Tricks at Your Fingertips
Our Kiefer Campground Blog is the information you need to make your next camping trip even more enjoyable. From RV and camping tips and tricks, to amazing campfire recipes, to advice on planning your next trip... the information below is here to help you. And please, feel free to comment and share your experiences, knowledge and favorite recipes. At Kiefer Campground, we are a family and all here to help each other enjoy the great outdoors to the fullest!
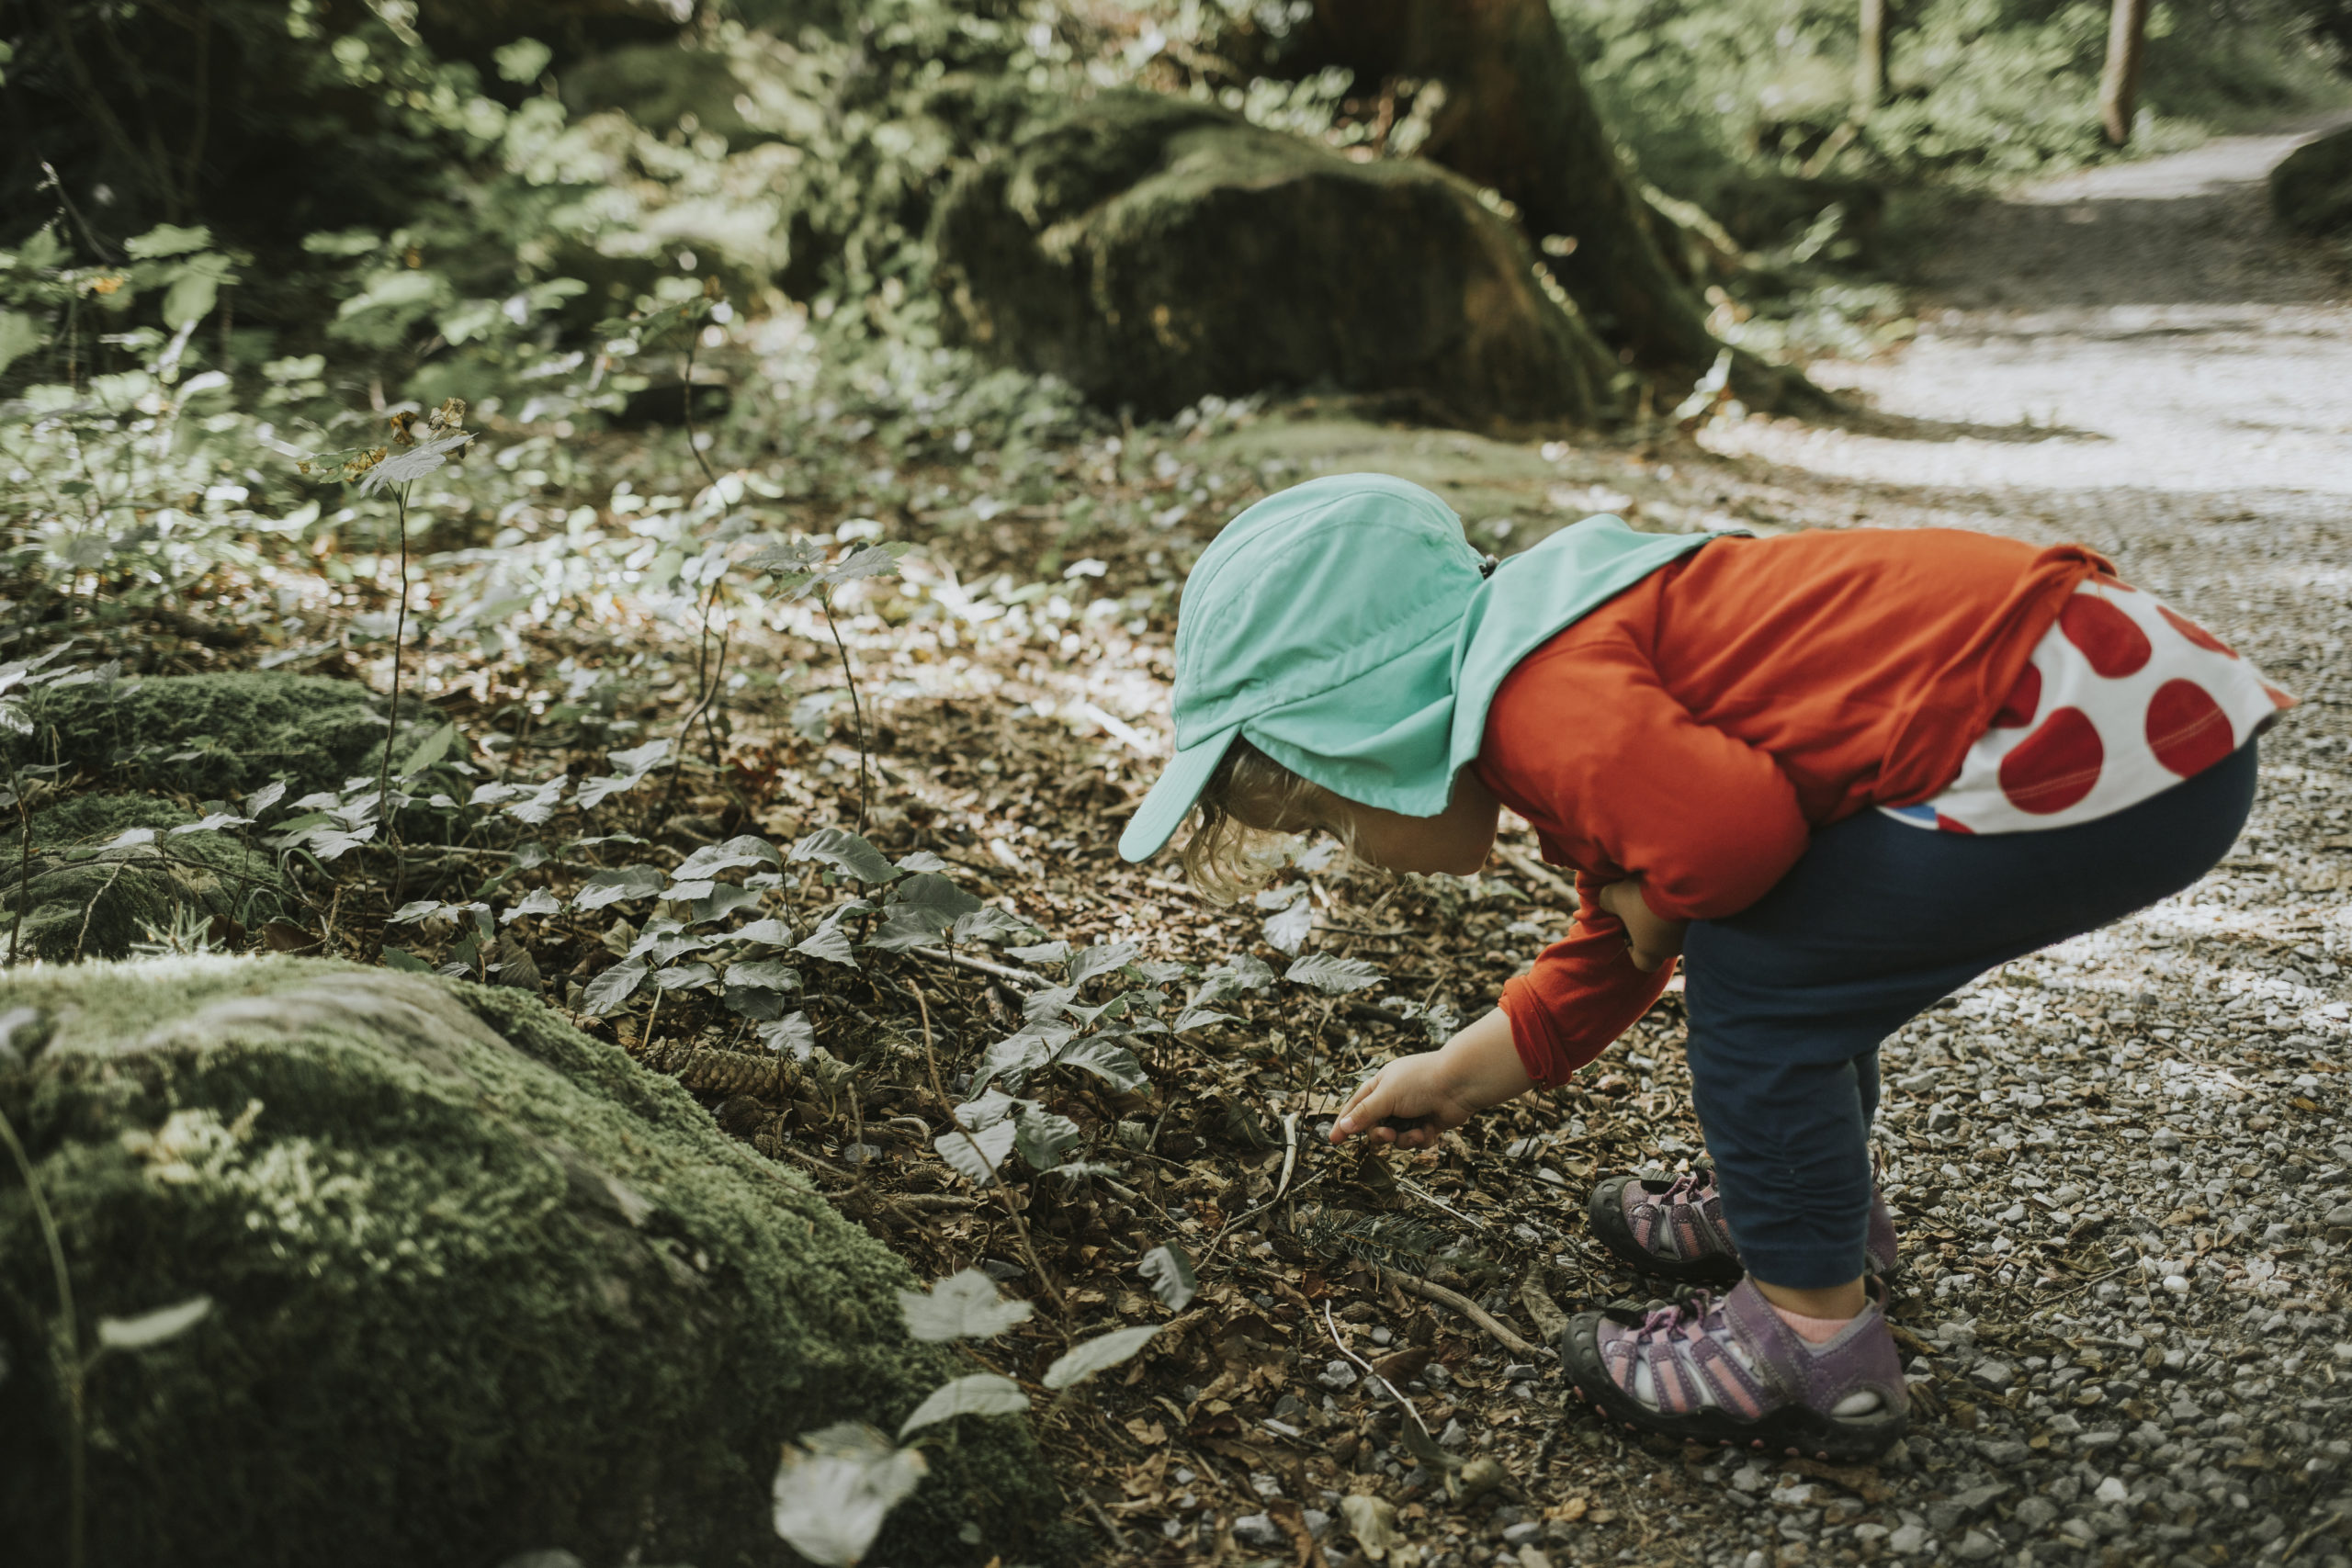
Nature Scavenger Hunt
A nature scavenger hunt sounds like a fantastic way to connect with the outdoors! Here’s a list of items you could include:
- Pinecone
- Feather
- Wildflower
- Smooth rock
- Acorn
- Bird’s nest
- Insect (be careful with this one!)
- Moss
- Fern frond
- Animal footprint
- Mushroom
- Seashell (if you’re near the coast)
- A piece of driftwood
- Caterpillar or butterfly
- Pine needle
- Spiderweb
- Burrow or animal hole
- Fallen leaf of a certain color
- A unique-shaped leaf
- Something you find beautiful and want to sketch or take a photo of
Feel free to customize this list based on your location and the season! And remember, always respect nature and leave everything as you found it. Have fun exploring!
Use this as a temple for you Nature Scavenger Hunt when camping at Terre Haute Campground!

Campfire Taco Potatoes
Campfire taco potatoes are a delightful twist on classic campfire fare. Here’s a simple recipe to make them:
Ingredients:
- Large baking potatoes
- Ground beef or turkey
- Taco seasoning
- Shredded cheese
- Sour cream
- Salsa
- Chopped lettuce
- Chopped tomatoes
- Chopped green onions
- Optional toppings: black olives, jalapenos, guacamole
Instructions:
- Prepare the potatoes: Scrub the potatoes clean and pierce them several times with a fork. This allows steam to escape while they cook.
- Wrap in foil: Individually wrap each potato tightly in aluminum foil. Make sure the foil is securely wrapped to prevent any juices from leaking out during cooking.
- Cook over the campfire: Place the foil-wrapped potatoes directly into the hot coals of the campfire. Cook for about 45 minutes to an hour, or until the potatoes are tender when pierced with a fork. Turn them occasionally to ensure even cooking.
- Cook the taco filling: While the potatoes are cooking, brown the ground beef or turkey in a skillet over the campfire. Drain any excess fat and add taco seasoning according to package instructions. Stir well and let it simmer until the flavors meld together.
- Assemble the toppings: Prepare your toppings by chopping lettuce, tomatoes, green onions, and any other desired ingredients. Place them in separate bowls for easy assembly.
- Assemble the taco potatoes: Once the potatoes are cooked, carefully unwrap them from the foil. Use a knife to slice each potato open lengthwise, then fluff the insides with a fork. Spoon the taco meat over each potato, then top with shredded cheese, lettuce, tomatoes, green onions, and any other desired toppings.
- Serve: Serve the campfire taco potatoes with a dollop of sour cream and salsa on top. Enjoy your delicious campfire meal!
These taco potatoes are customizable, so feel free to add or omit toppings based on your preferences. They’re perfect for a hearty and satisfying meal around the campfire!
On your next camping trip to Terre Haute Campground, try this recipe for Campfire Taco Potato.
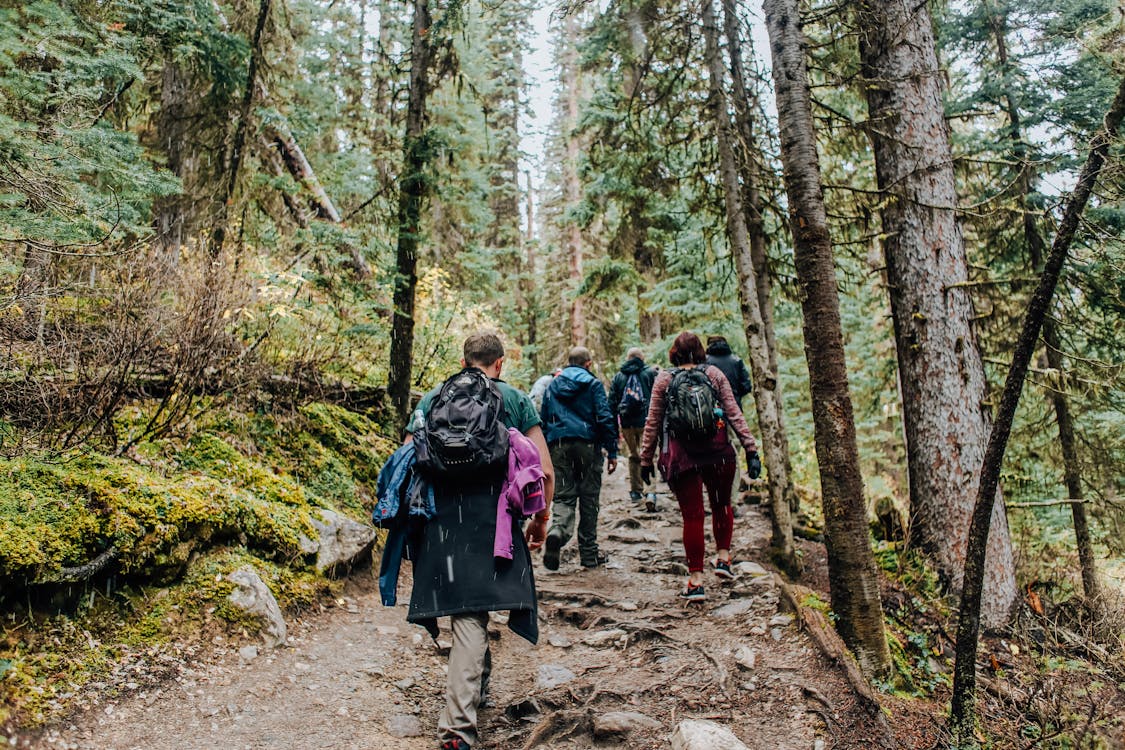
Rookie Mistakes to Make When Hiking
Hiking is a wonderful activity that allows you to connect with nature, get exercise, and experience beautiful landscapes. However, for newcomers to hiking, there are some common mistakes that can turn an enjoyable outing into a challenging or even dangerous experience. Here are some rookie mistakes to avoid when hiking:
- Not Planning Ahead: Failing to plan your hike properly is a common mistake. This includes not researching the trail, underestimating the difficulty, not checking the weather forecast, and not informing someone of your hiking plans.
- Overpacking or Underpacking: Carrying too much gear can weigh you down and make the hike more difficult. Conversely, not bringing essential items like enough water, snacks, or proper clothing layers can lead to discomfort or even danger.
- Ignoring Footwear: Wearing inappropriate footwear can lead to blisters, discomfort, or even injuries. Invest in a pair of sturdy, well-fitting hiking boots or shoes and break them in before hitting the trails.
- Not Bringing Navigation Tools: Relying solely on smartphone maps can be risky, especially if you’re hiking in areas with poor reception. Always carry a map and compass (and know how to use them) or a GPS device as backup.
- Skipping the Trailhead Briefing: Many trails have informational boards or signs at the trailhead that provide important details about the route, including distance, elevation gain, hazards, and wildlife warnings. Take the time to read these before starting your hike.
- Going Alone: Hiking alone, especially on unfamiliar or challenging trails, can be risky. Always hike with at least one companion, and if you must hike solo, inform someone of your plans and expected return time.
- Underestimating Time and Distance: Beginners often underestimate how long it will take to complete a hike or how far they can comfortably walk. Start with shorter, easier trails and gradually work your way up to more challenging hikes.
- Not Staying Hydrated and Fueled: Dehydration and low energy levels can quickly ruin a hike. Bring enough water and snacks to stay hydrated and fueled throughout your trek.
- Ignoring Trail Etiquette: Familiarize yourself with trail etiquette, such as yielding to uphill hikers, staying on marked trails, and properly disposing of trash. Respecting nature and other hikers enhances everyone’s experience.
- Not Being Prepared for Emergencies: Accidents can happen on the trail, so it’s important to be prepared. Carry a basic first aid kit, know basic first aid skills, and have a plan for what to do in case of emergencies.
By avoiding these common rookie mistakes and taking the time to prepare properly, you can ensure a safe and enjoyable hiking experience.
Whether you’re walking around the Terre Haute Campground or on a hiking trail, always be prepared.
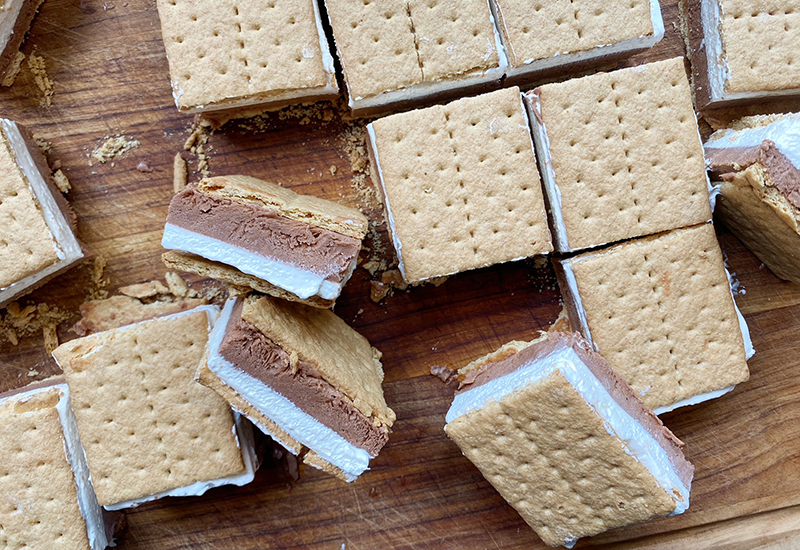
Frozen S’mores
Frozen S’mores are a delicious twist on the classic campfire treat, perfect for hot summer days or anytime you’re craving that irresistible combination of chocolate, marshmallow, and graham crackers. Here’s a simple recipe to make Frozen S’mores:
Ingredients:
- Graham crackers
- Marshmallows (regular or mini)
- Chocolate bars or chocolate chips
- Ice cream (vanilla or chocolate, or any flavor you prefer)
- Optional toppings: crushed graham crackers, chocolate syrup, whipped cream
Instructions:
- Line a baking sheet or tray with parchment paper.
- Break the graham crackers in half to form squares and place them on the baking sheet.
- Place a marshmallow on top of each graham cracker square.
- Broil the marshmallows in the oven for a few minutes until they are toasted to your desired level. Alternatively, you can use a kitchen torch to toast the marshmallows.
- Remove the toasted marshmallows from the oven and let them cool for a minute.
- While the marshmallows are cooling, prepare your ice cream. If using ice cream in a container, scoop out a small amount and place it on one graham cracker square.
- Place a piece of chocolate on top of the ice cream.
- Carefully place a toasted marshmallow on top of the chocolate.
- Place another graham cracker square on top to form a sandwich.
- Repeat the process for the remaining ingredients.
- Once all the Frozen S’mores sandwiches are assembled, transfer them to the freezer and let them freeze for at least 1-2 hours, or until the ice cream is firm.
- Before serving, you can roll the edges of the Frozen S’mores in crushed graham crackers for an extra crunch, drizzle them with chocolate syrup, or add a dollop of whipped cream on top.
- Enjoy your Frozen S’mores straight from the freezer and savor the delicious combination of flavors and textures!
These Frozen S’mores are sure to be a hit with kids and adults alike, and they’re a fun and refreshing way to enjoy a summertime favorite all year round.
The perfect recipe for a summer camping trip to Terre Haute Campground!

Homemade Lavender Salve
Making homemade lavender salve is a wonderful project that combines the soothing properties of lavender with the moisturizing effects of a salve. Here’s a simple recipe to get you started:
Ingredients:
- 1/2 cup dried lavender flowers
- 1 cup carrier oil (such as olive oil, sweet almond oil, or coconut oil)
- 1/4 cup beeswax pellets or grated beeswax
- Lavender essential oil (optional, for extra fragrance)
Equipment:
- Double boiler or makeshift double boiler (a heatproof bowl set over a pot of simmering water)
- Cheesecloth or fine mesh strainer
- Clean, dry jars or tins for storage
Instructions:
- Infuse the oil: In the top of your double boiler or heatproof bowl, combine the dried lavender flowers and the carrier oil. Heat gently over low to medium heat for 1-2 hours, stirring occasionally. This will infuse the oil with the fragrance and properties of the lavender. Make sure the oil doesn’t get too hot to avoid damaging the beneficial properties of the lavender.
- Strain the oil: Once the oil is infused to your liking, remove it from the heat and let it cool slightly. Strain the oil through a cheesecloth or fine mesh strainer into a clean bowl or directly into your double boiler if you’re using it again for the next step. Squeeze or press the lavender flowers to extract as much oil as possible.
- Add beeswax: Return the infused oil to the double boiler or heatproof bowl. Add the beeswax pellets or grated beeswax to the oil. Heat gently, stirring occasionally, until the beeswax is completely melted and well combined with the oil.
- Optional: Add essential oil: If you want to enhance the lavender fragrance of your salve, you can add a few drops of lavender essential oil to the mixture at this stage. Stir well to incorporate.
- Pour into containers: Carefully pour the lavender salve mixture into clean, dry jars or tins for storage. Allow the salve to cool completely before sealing the containers.
- Label and store: Once the salve has cooled and solidified, label your containers with the date and contents. Store the lavender salve in a cool, dark place to prolong its shelf life.
Usage:
Apply the lavender salve to dry or irritated skin as needed, massaging gently until absorbed. Enjoy the soothing benefits of lavender!
Remember to do a patch test before using the salve extensively, especially if you have sensitive skin or allergies to any of the ingredients. Enjoy your homemade lavender salve!
This recipe for Homemade Lavender Salve is perfect when being outdoors at Terre Haute Campground.
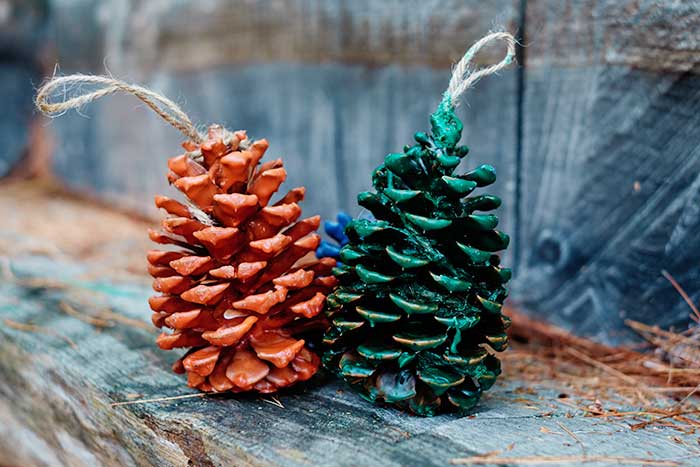
Pine Cone Fire Starter
Using pine cones as fire starters can be an effective and natural way to ignite a fire. Here’s a simple guide on how to make pine cone fire starters:
Materials:
- Pine cones (dry ones work best)
- Wax (paraffin or old candles)
- Double boiler or a makeshift one (a small pot placed inside a larger one with water)
- String or twine (optional)
- Essential oils (optional, for fragrance)
Instructions:
- Collect Dry Pine Cones:
- Gather pine cones from the ground or purchase them. Make sure they are dry, as damp pine cones can be challenging to ignite.
- Melt Wax:
- Use a double boiler or create one by placing a smaller pot inside a larger one with water. Melt the wax in the smaller pot. If you’re using old candles, remove any wicks or debris.
- Add Fragrance (Optional):
- If you want scented fire starters, add a few drops of essential oil to the melted wax. Stir well to distribute the fragrance.
- Dip or Coat Pine Cones:
- Use tongs or a fork to dip each pine cone into the melted wax. Alternatively, you can use a brush to coat the pine cones with wax. Make sure to cover the cone thoroughly.
- Let Excess Wax Drip Off:
- Hold the coated pine cone above the wax pot for a few moments to allow excess wax to drip off.
- Place on Parchment Paper:
- Set the wax-coated pine cones on a sheet of parchment paper to cool and harden. Make sure they don’t touch each other during this process.
- Optional: Add String (Handle):
- Before the wax completely hardens, you can attach a string or twine to the pine cone to make it easier to handle and light. Simply tie the string around the base of the cone.
- Store:
- Once the wax has hardened, store the pine cone fire starters in a cool, dry place. They can be stored in a basket or container near your fireplace or camping gear.
To use the pine cone fire starter, place it in your fireplace or fire pit, and ignite it like you would with any fire starter. The wax-coated pine cone will burn, providing a flame to help ignite the rest of your firewood. Additionally, the wax helps the fire starter burn longer than a regular pine cone would on its own.
Try this fire start on your next trip to Terre Haute Campground!

Campfire Sausage Hash Brown Cups
Making campfire sausage hash brown cups can be a fun and delicious outdoor cooking experience. Here’s a simplified version of the recipe that you can prepare over a campfire:
Ingredients:
- 1 pound (about 450g) frozen hash browns, thawed
- 1/4 cup melted butter
- Salt and pepper, to taste
- 1 cup shredded cheddar cheese
- 1 cup cooked and crumbled breakfast sausage
- 8 large eggs
- Cooking spray or foil for the campfire cooking surface
Instructions:
- Prepare Campfire: Set up your campfire with a cooking grate or a suitable cooking surface. Ensure you have a good bed of hot coals.
- Mix Hash Browns: In a bowl, mix the thawed hash browns with melted butter, salt, pepper, and shredded cheddar cheese.
- Form Cups: Divide the hash brown mixture into portions. Form each portion into a cup shape, pressing them onto the bottom and up the sides of heatproof camping dishes or foil packets. Make sure the cups are sturdy.
- Cook Hash Browns: Place the hash brown cups on the cooking grate or suitable surface over the campfire. Cook for about 10-15 minutes or until the cups are crispy and golden brown. Keep an eye on them and adjust the distance from the flames as needed.
- Cook Sausage: While the hash brown cups are cooking, heat the breakfast sausage in a skillet or directly on the campfire grate.
- Assemble Cups: Once the hash brown cups are cooked, add a spoonful of the cooked sausage into each cup.
- Crack Eggs: Crack one egg into each hash brown cup on top of the sausage.
- Cover and Cook Eggs: Cover the cups with a lid, foil, or another heatproof plate to help the eggs cook. Cook for an additional 10-15 minutes or until the eggs are done to your liking.
- Serve: Carefully remove the hash brown cups from the campfire. Let them cool for a few minutes before serving.
Remember to monitor the heat from the campfire and adjust accordingly. Cooking times may vary based on the intensity of the heat. Enjoy your campfire sausage hash brown cups!
This is a must-try breakfast recipe on your next trip to Terre Haute Campground!

The Difference Between Venomous and Nonvenomous Snakes
The primary difference between venomous and nonvenomous snakes lies in their ability to produce and deliver venom. Venom is a toxic substance that some snakes use for hunting prey or defending themselves. Here are key distinctions:
- Venomous Snakes:
- Venom Production: Venomous snakes possess specialized glands, typically located near the base of their upper jaws, which produce venom. These glands are connected to hollow fangs, through which the venom is delivered.
- Venom Delivery: Venomous snakes have specialized fangs that inject venom into their prey or potential threats. These fangs can be either permanently erect (as in vipers) or hinged (as in cobras and coral snakes).
- Function: Venom is used to immobilize or kill prey by either causing tissue damage or affecting the prey’s nervous system. Some venomous snakes can also use their venom for self-defense.
- Nonvenomous Snakes:
- No Venom Production: Nonvenomous snakes lack venom-producing glands and specialized fangs. Instead, they rely on other methods for capturing and subduing prey.
- Constriction: Many nonvenomous snakes are constrictors. They use their bodies to wrap around prey, squeezing it until it suffocates. Examples include boa constrictors and pythons.
- Swallowing Whole: Nonvenomous snakes often have flexible jaws that allow them to swallow prey whole. They may consume a variety of animals, from rodents to amphibians.
It’s important to note that not all venomous snakes are dangerous to humans, as some have mild venom or are not aggressive. Conversely, some nonvenomous snakes can be mistaken for venomous ones due to similar coloration or behavior. It is crucial to exercise caution and seek professional assistance when dealing with snakes, especially in regions where venomous species are present. If bitten by a snake, immediate medical attention is essential, as venomous snake bites can be life-threatening.
At Terre Haute Campground we ask you to always take precautions in your surroundings.

Oreo S’Mores
Oreo S’Mores is a delicious variation of the classic campfire treat, S’mores, which typically consists of marshmallows, chocolate, and graham crackers. The twist here involves substituting the traditional graham crackers with Oreo cookies.
To make Oreo S’Mores, you’ll need:
Ingredients:
- Oreo cookies (regular or any flavored variation)
- Marshmallows
- Chocolate bars or chocolate pieces (milk chocolate or any other preferred type)
Instructions:
- Prepare the Oreo cookies:
- Open the Oreo cookies and separate them, keeping the side with the cream filling.
- Roast the marshmallows:
- Roast marshmallows over an open flame (campfire, stove, or using a kitchen torch) until they are golden brown and gooey inside.
- Assemble the Oreo S’Mores:
- Place a piece of chocolate (or chocolate pieces) on the side of the Oreo cookie without the cream filling.
- Place the roasted marshmallow on top of the chocolate.
- Top with another Oreo cookie, cream side down, creating a sandwich with the marshmallow and chocolate in the center.
- Allow the chocolate to melt:
- The heat from the roasted marshmallow will melt the chocolate, creating a gooey and delicious combination.
- Serve and enjoy:
- Allow the Oreo S’Mores to cool for a moment before indulging in this delightful treat.
Feel free to get creative and experiment with different Oreo flavors, such as mint, peanut butter, or double-stuffed Oreos, to add extra layers of flavor to your Oreo S’Mores. This twist on the classic S’Mores is perfect for those who love the combination of chocolate, marshmallow, and the iconic Oreo cookie.
You must try these Oreo S’mores on your next trip to Terre Haute Campground!
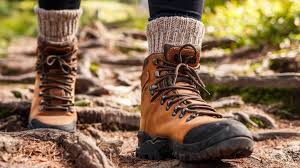
How To Toughen Up Your Feet Before A Hike
Toughening up your feet for a hike is important to prevent blisters and discomfort during long treks. Here are some tips to help you toughen up your feet:
- Gradual Conditioning:
- Start with short walks and gradually increase the duration and intensity of your hikes. This allows your feet to adapt to the stress gradually.
- Wear Proper Footwear:
- Invest in good quality hiking boots that provide proper support and fit well. Ill-fitting shoes can cause blisters and other foot issues.
- Moisturize:
- Keep your feet moisturized to prevent dry and cracked skin. However, avoid excessive moisture, as this can contribute to blisters.
- Foot Soaks:
- Soaking your feet in warm water can help toughen them up. You can add Epsom salts or tea tree oil to the water for added benefits.
- Massage:
- Massage your feet regularly to improve circulation and flexibility. This can also help prevent stiffness and reduce the risk of injury.
- Barefoot Walking:
- Gradually introduce barefoot walking on different surfaces to toughen up the soles of your feet. Start with smooth surfaces and then progress to rougher terrains.
- Callus Maintenance:
- Gently file or buff calluses to keep them from becoming too thick and uncomfortable. Be cautious not to overdo it, as excessive removal can lead to soreness.
- Taping and Bandaging:
- Use sports tape or moleskin to protect areas prone to blisters. This can provide an additional layer of protection during the toughening-up process.
- Vary Your Terrain:
- Walk on different types of surfaces, such as gravel, sand, grass, and dirt, to expose your feet to various textures and conditions.
- Foot Exercises:
- Perform exercises to strengthen the muscles in your feet and ankles. This can enhance their endurance and resilience.
- Proper Nail Care:
- Keep your toenails trimmed to prevent them from causing discomfort or injury during a hike.
- Orthotic Inserts:
- Consider using orthotic inserts if you have specific foot issues. These can provide extra support and cushioning.
- Rest and Recovery:
- Allow your feet adequate time to rest and recover between hikes. This helps prevent overuse injuries and ensures that your feet stay resilient.
Remember that everyone’s feet are different, and what works for one person may not work for another. Pay attention to your body and make adjustments accordingly. If you experience persistent foot pain or discomfort, consult with a healthcare professional for personalized advice.
While hiking at Terre Haute Campground, try these tricks to toughen up your feet.

Family owned and operated, Kiefer Campgrounds strive to offer you the best rates for a comfortable location with outstanding service, and spotless facilities. When you stay in one of our parks, you are no longer just a happy camper, but a part of our family! We are most certain you will enjoy your stay with us. Pick your favorite location and book your spot now before it’s too late! You’ll be happy you did!